With this kit purchased from LToy Creations Etsy Shop, all you’ll need is glue. Here are a couple different options you can use. Links have been provided below for your convenience.
- Option #1: Medium thickness Superglue
- Option #2: Extra Thick Superglue
- Option #3: Combo Superglue and Accelerator
- General link for superglue
(If you’d like to help me out, I would receive a commission when items are purchased through the affiliate links above. Thanks!)
1.) First step would be to cut out visor to the shape you want it. Place the visor on the inside of the helmet and draw an outline of where the visor will sit.
2.) As shown in the picture, orient the pieces to whichever combination works best for you (The numbers are on the pieces). After you’ve identified the positioning, follow the diagram below and ONLY glue one side (either all of the left OR all of the right pieces).
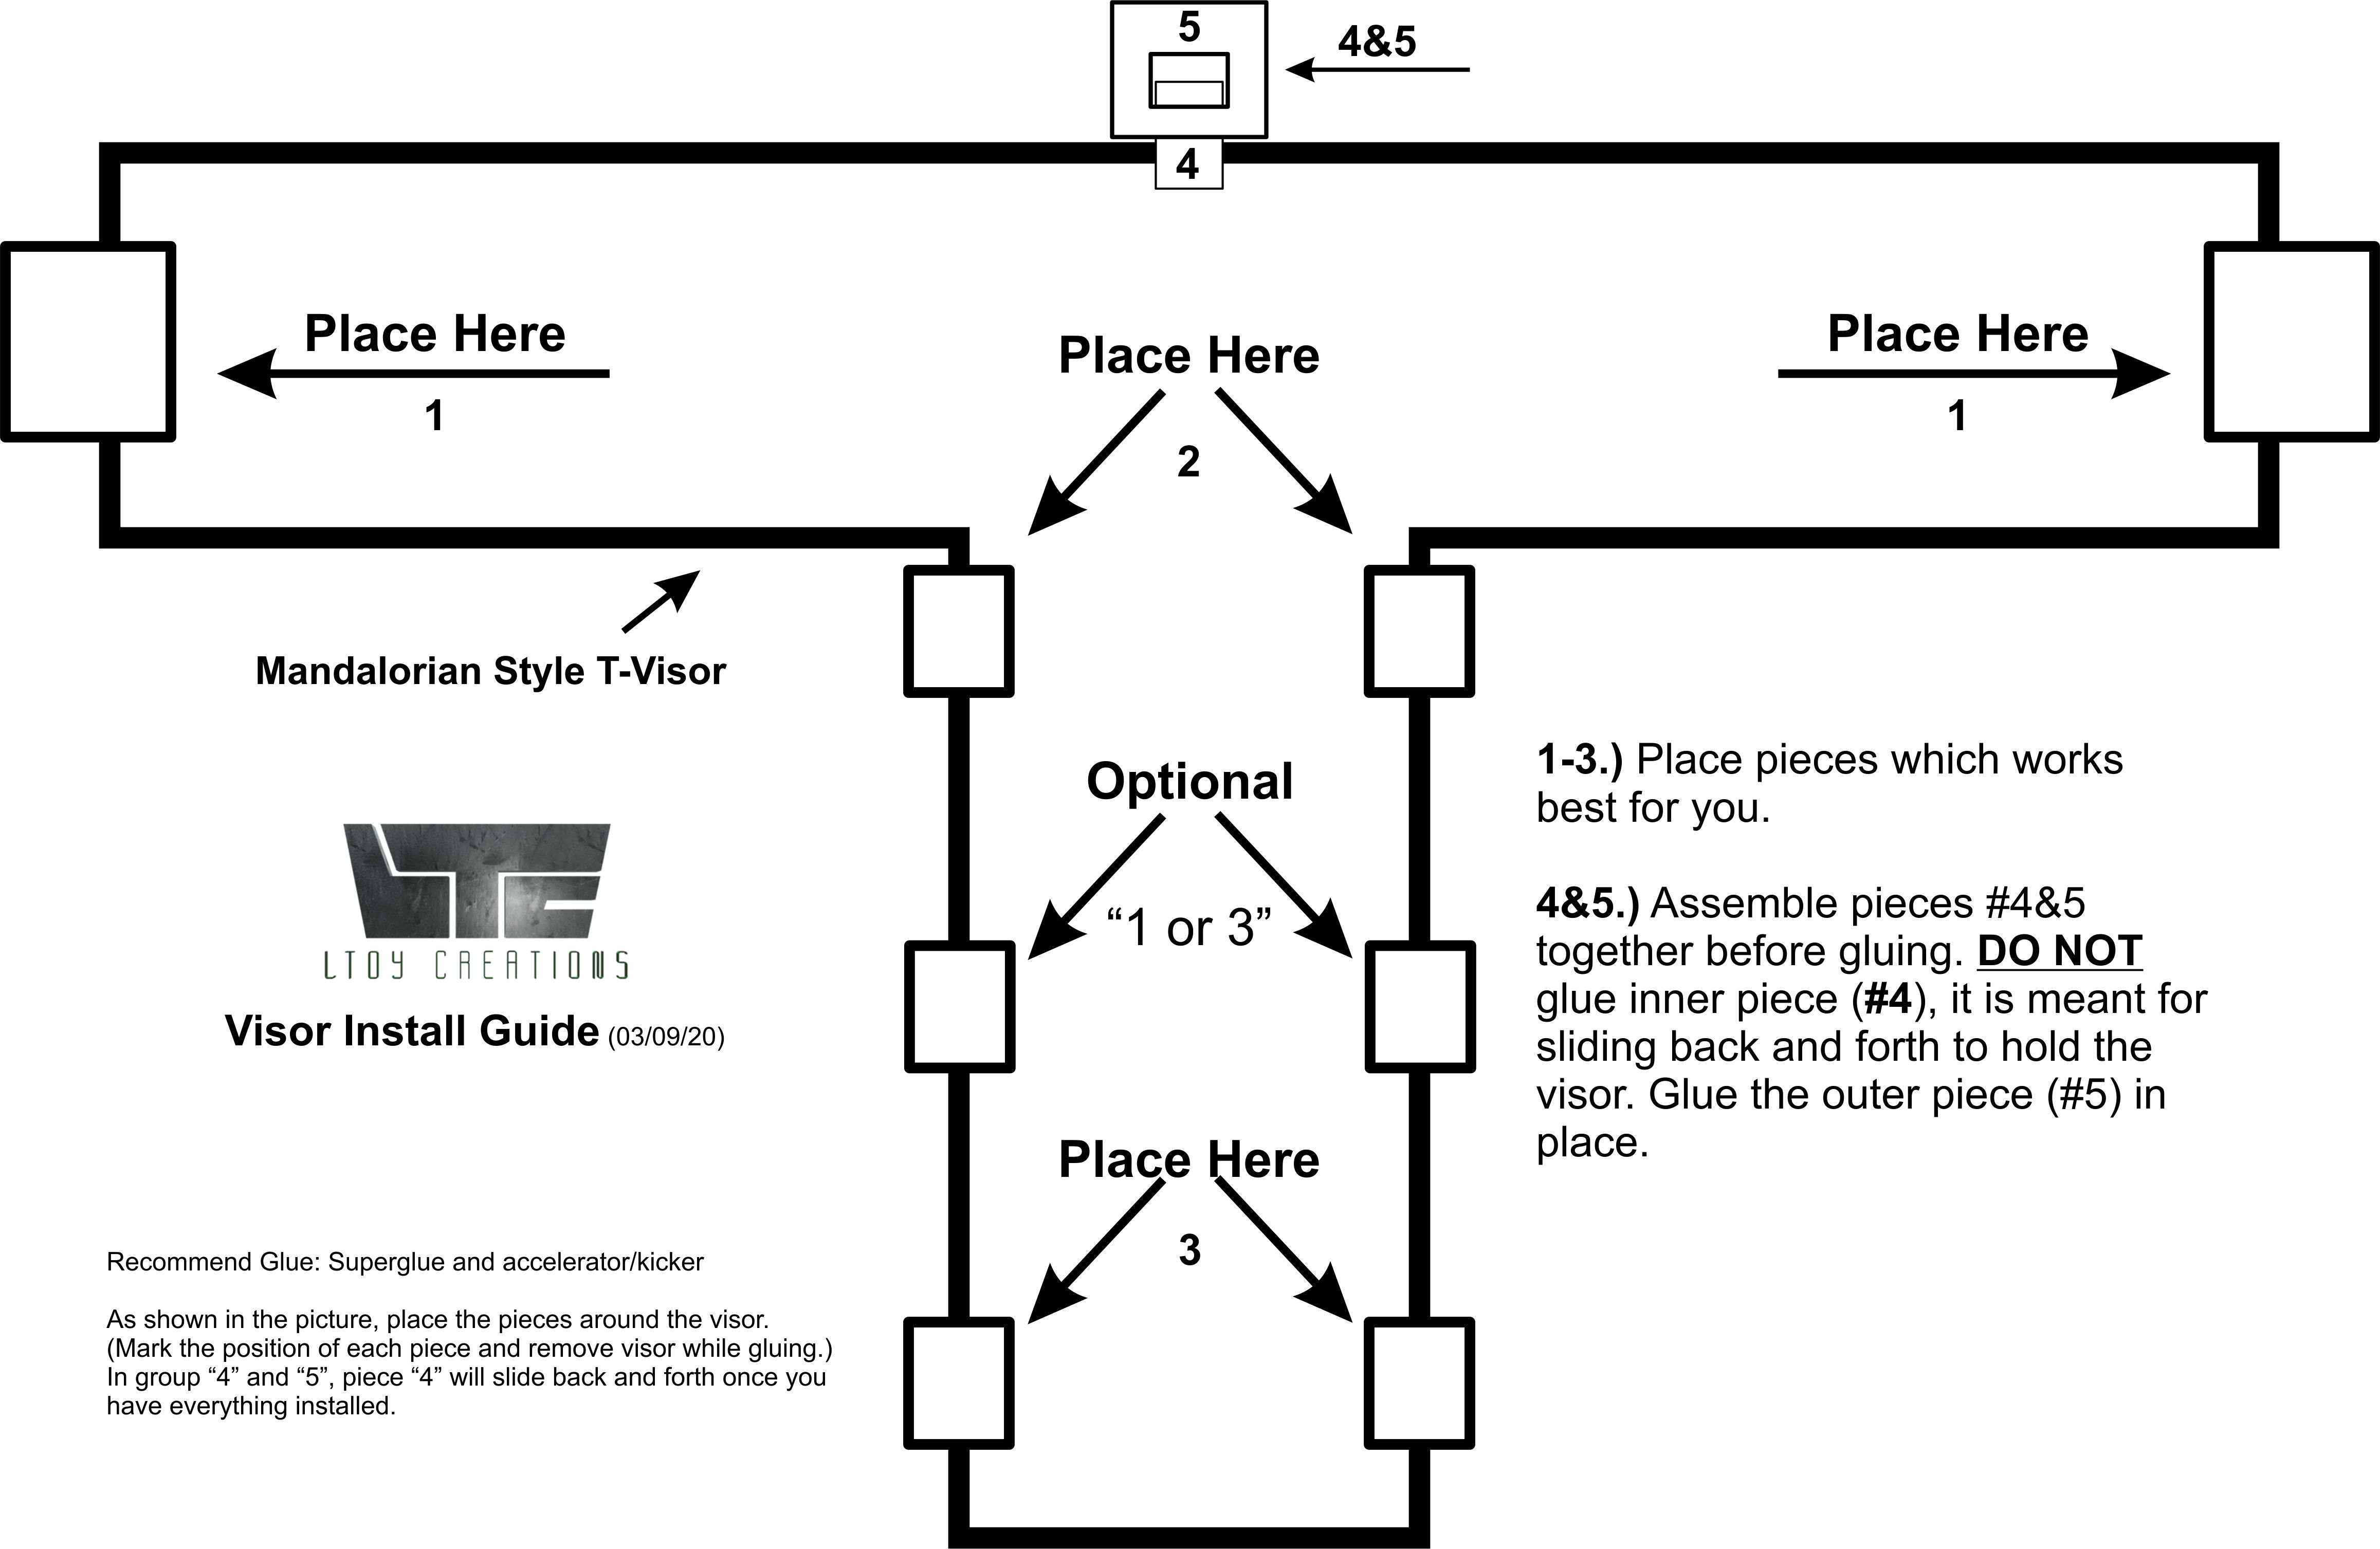
3.) After all of one side is glued in and dried, place the visor back into the helmet to verify the position of the pieces on the opposite sides. Glue in opposite side after you have verified its placement.
4.) Assemble pieces 4 and 5 and place in the correct position according to the diagram. NOTE: Be sure NOT to glue piece 4. This piece is meant to side back and forth to allow the visor to be released when desired. When you have verified the position, glue piece 5 into place.
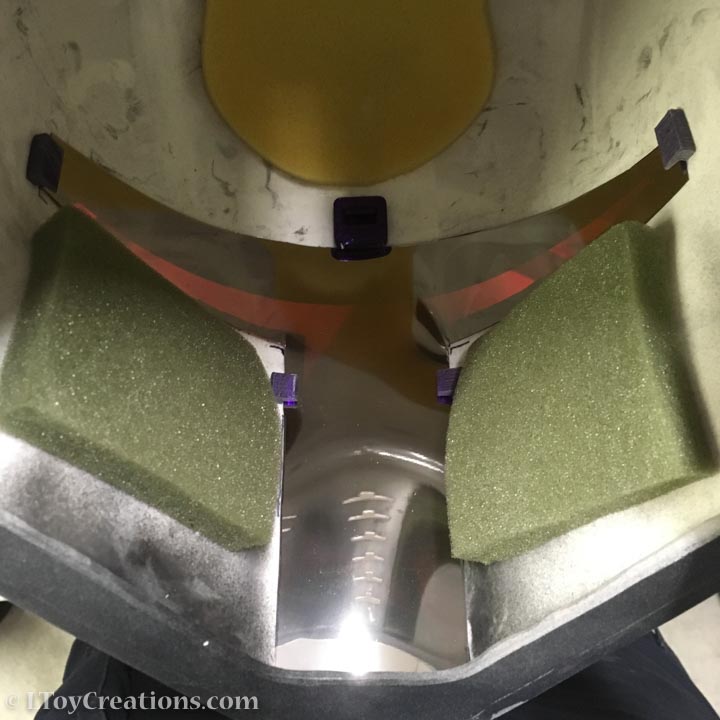
5.) You’re all done! If you have any additional pieces, you can use them to reinforce the visor at its “weak points” aka if you see a gap between the visor and the inside of the helmet.

If this was helpful to you and you’d like to support me with a coffee, click the link below! Thanks!